We have this awkward in-between room that separates a first floor bedroom and the only downstairs bathroom. Sort of like a giant hallway. A roomway! It took us a good six months to figure out what to do with it.
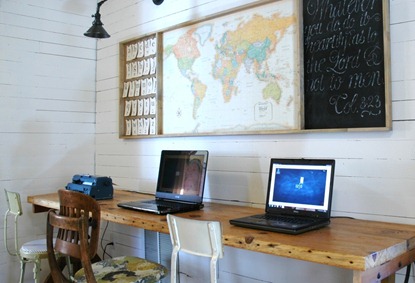
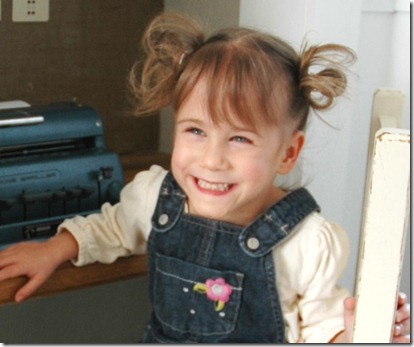
Until the kids have flown the coop, it will serve as a schoolroom of sorts. Some of their homeschooling is done on the computer, so we decided to have a dedicated area for computer set-up. It also serves as a spot for Charlotte’s Brailler.
In a later post, I’ll show you the floor to ceiling bin system set up on the opposite side of the room that holds all of the school supplies. I’ve come to love this room for all the organizational goodness it provides. This room (like so many other rooms) is far from finished, as you can see below:
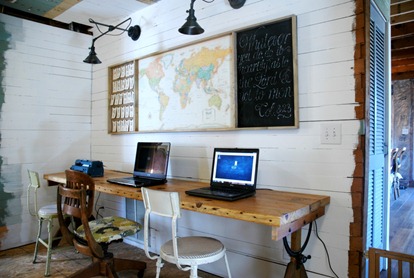
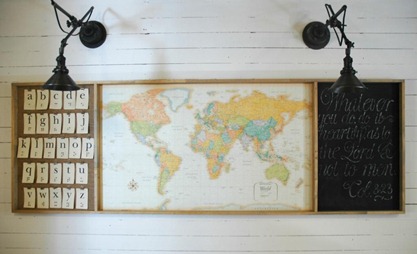
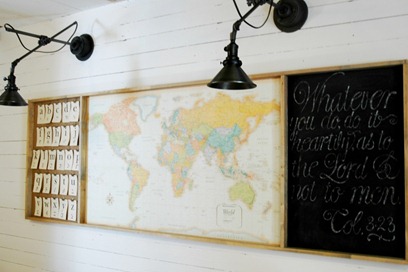
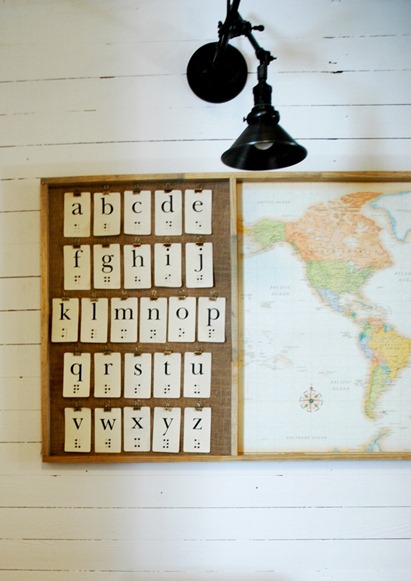
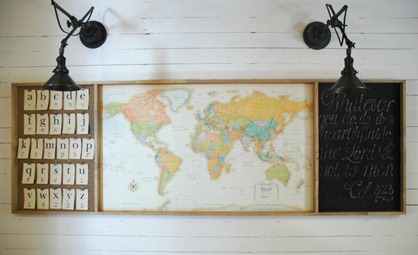
I can at least show you what we did with the big empty wall in the room. My husband built a long table which I’ll be sharing more about in another post. I knew I wanted to somehow incorporate a map, a chalkboard, and a bulletin board above it, and this is how we ended up going about it…
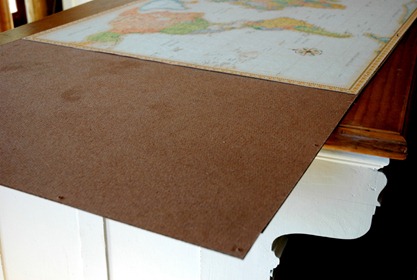
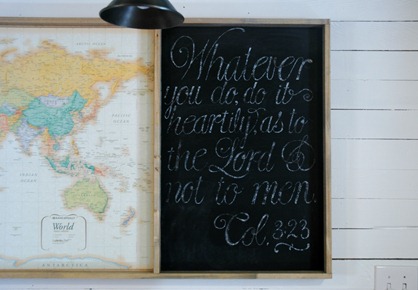
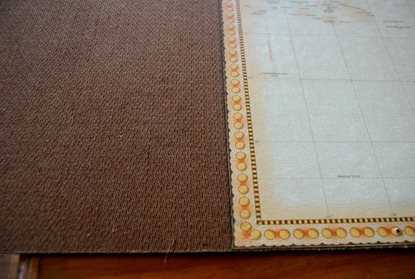
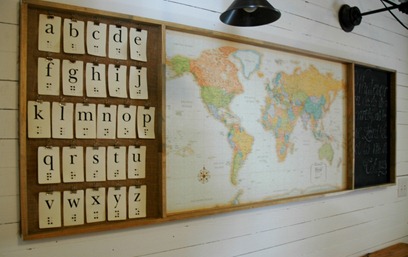
We measured and cut (with a circular saw) a big piece of inexpensive “hardboard” to fit the space and the map and spray mounted the map onto the center of it.
Our map is a 4’ x 2.5’ Rand McNally World map. I liked the vintage colors in this particular one.
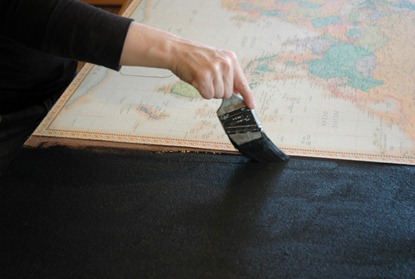
After applying the map, I brushed chalk board paint on the right side.
And on the left, we applied the burlap also using spray mount. I don’t have pictures of us applying the burlap but you can imagine. Spray and press.
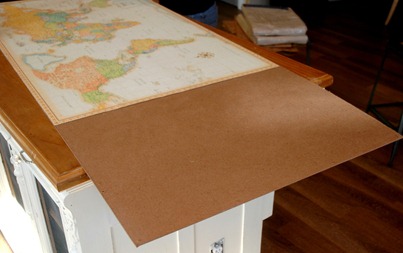
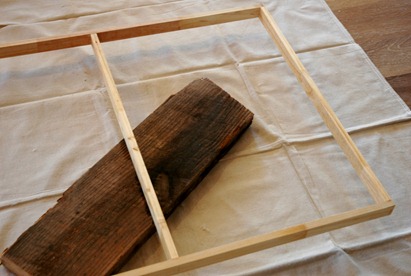
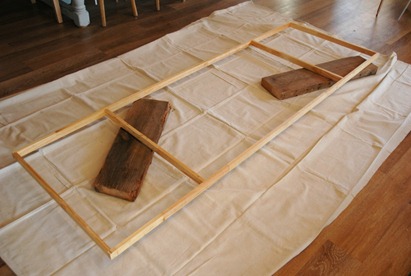
And then my handy husband made a simple frame using inexpensive 1 x 2 pine. Otherwise known as “fingerboard”.
We put it up on blocks to make staining easier.
I used a “Weathered Oak” stain to make it look old.
My husband attached the board to the frame from the back using wood screws. And WALLA!
A custom bulletinboardmapchalkboard-thingy-me-bob! :)
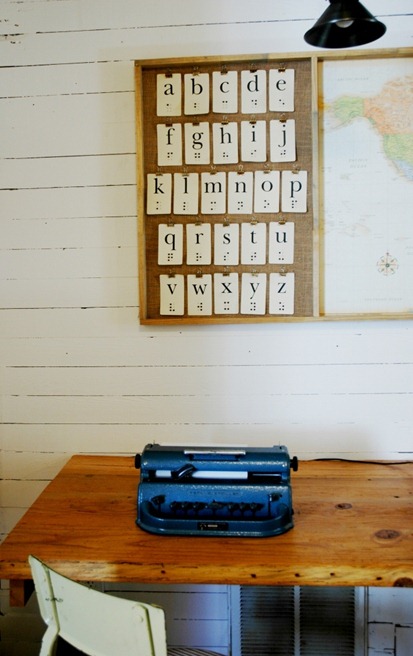
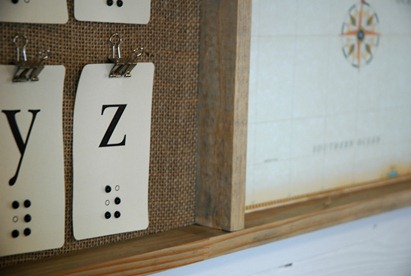
For the bulletin board, I used the same braille flashcards we had in our last house. You can read about them here.
Once again, the flashcards are a good visual reminder of what we’re all supposed to be learning (yes, the whole family is learning braille!), but it’s also handy being able to take the flashcards down from the clips to quiz Charlotte. It’s really just a faux bulletin board, since I used stickies to attach the metal clips. If you really wanted to use tacks, you would likely have to use cork board instead of hardboard. Because hardboard is very… hard.
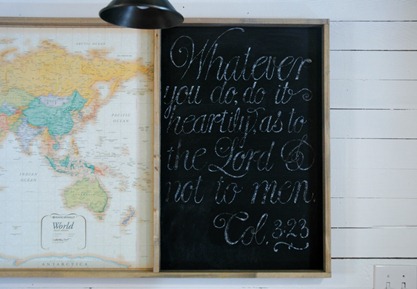
The verse written on the chalkboard reminds us of how we are to work, and for whom. Fitting for a school room.
The lights came from Restoration hardware at 50% off! I’ve long admired them and so happy to have them for this space.
I can’t tell you how thrilling it is for me to be organized again! After this crazy move, I spent so many months feeling discombobulated. But now I feel like I can finally let out a sigh of relief. It’s all coming together…little by little, wall by wall.
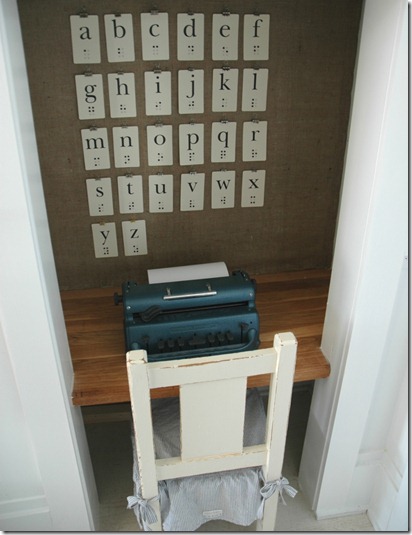
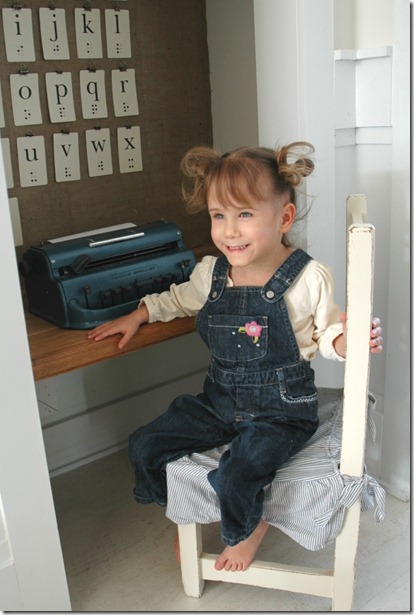
As mentioned in a previous post, this Perkins Brailler has become a permanent fixture in our home.
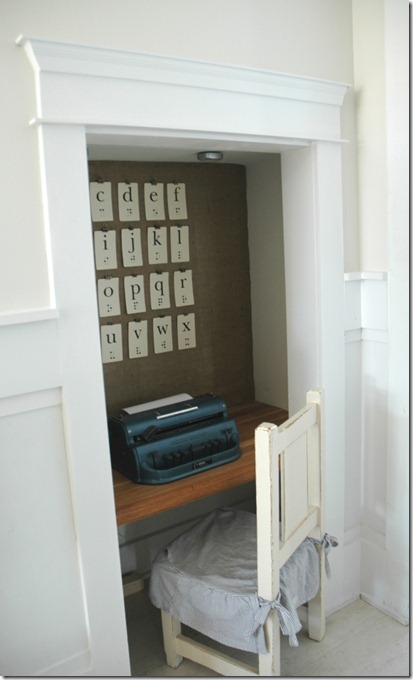
Just like you and I need easy access to a pen and paper, little Charlotte needs something quick and accessible too. And just like sighted children who develop writing skills by first scribbling with crayons, Charlotte “scribbles” on her brailler.
However, her “crayon” is bigger and heavier than most, and can’t be simply tucked in a drawer. So, we tucked it in a closet instead.
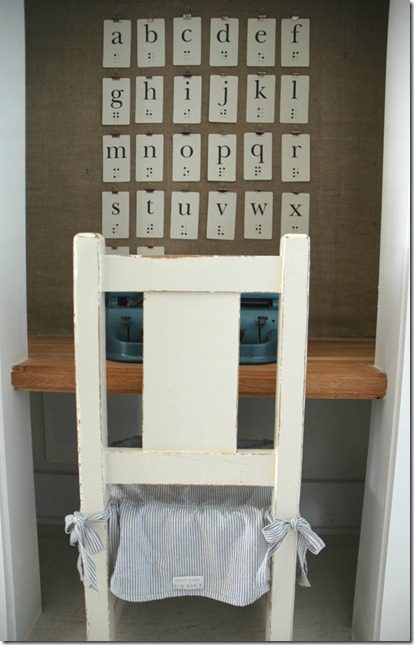
We took off the closet door, and my handy husband made a desk top and built it in. I lined the back of the closet with burlap for a bulletin board effect.
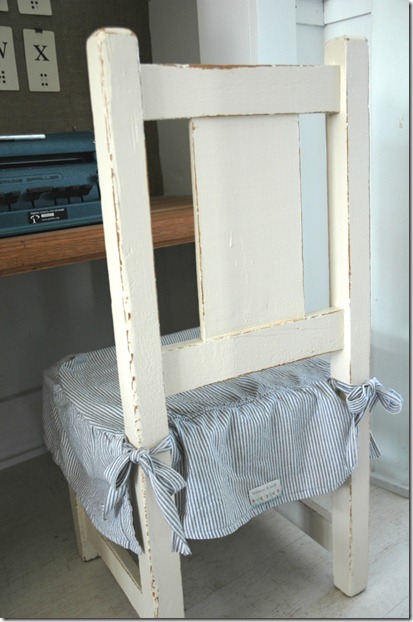
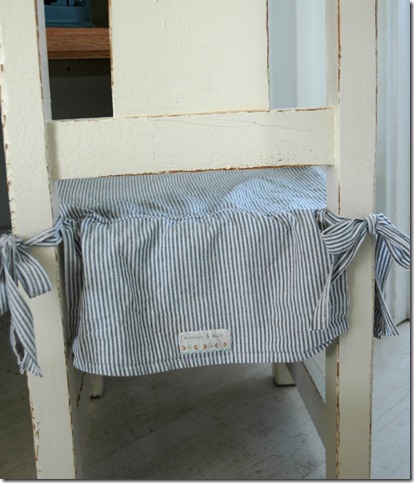
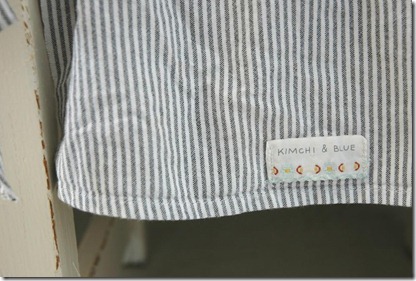
I painted and distressed an old chair a creamy white, then used a thrift store shirt to make a little skirt. If you’ve been reading my blog for a while, you’ll know this wasn’t my first time repurposing clothing.
I thought the tag in the shirt was so cute, I decided to utilize it.
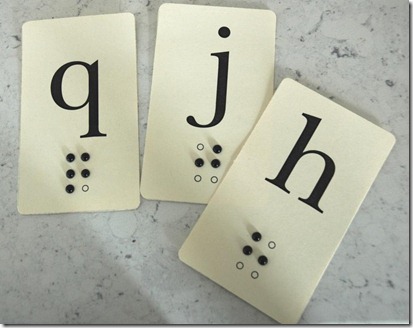
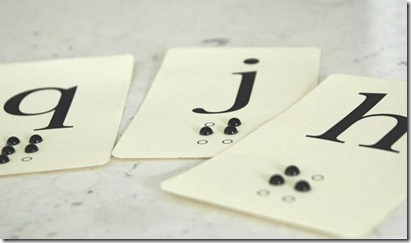
When I started out this project, my vision was for a wall of vintage braille flashcards above her desk. But when was the last time you happened upon vintage braille flashcards? Me neither. So I made my own…
I found raised stick-on dots at the craft store. Score!
We can easily take the flashcards on and off the metal hooks for practical use. They are for Charlotte to learn by touch and for the rest of us to learn by sight.
I often think how humorous it is that God would place a blind child with me… a woman so obviously drawn to aesthetics. Perhaps it’s to help me “see” things from a different perspective. Yes, I’m sure that’s part of it.
But I suppose if nothing else, Charlotte has a mommy that will happily help her decorate her first home. :)
A frequently asked question is… where do I find the time?
For blogging.
For sewing.
For organizing.
For designing.
For sleeping…sometimes.
It’s called “Rest Time”. It occurs from 1:00-3:00 p.m. in our house, Monday through Friday. While the littlest naps, the big kids take on some school reading.
It’s amazing all that can be accomplished in a two hour period once you set your mind to it. It’s really as simple as that!

You see, there is a wall that sits opposite the piano. But now I realize my dear readers, you might have thought I meant I'd show our project going on behind the wall of the piano. That project is probably a post for next week (if we finish the project in time that is!).

Sooo, on the opposite wall of the piano, we have bookshelves for little Charlotte to help herself to. They are special shelves reserved just for her braille and touch & feel books.


But our girl's room had a huge blank area needing to be filled with something (which I didn't show in the pictures). We decided to move the art table to their room, and utilize the school room more efficiently. The kids take turns doing a few different things on the computer (mine) during school time, so my desk works in here rather practically.

I love the bird calendar I found at Barnes and Nobles. It has the most amazing paintings. I think I need to move it up higher though, as the computer screen is competing for attention (it's interesting how perspective can change when I see a room in photos as opposed to real life).

My desk was a hand-me-down from my parents. It's an antique drafting table and I grew up BEGGING them to pass it down to me. They finally did, and I'm so grateful... it's one of my favorite things.

There are just some plain old ugly things about today's technology... ugly computer, ugly printer, ugly cords (why oh why do they make them black???). And then to top it all off, paperwork, cd's and other miscellaneous office junk just adds to the ugly. In an effort to mask it, I made some white fabric liners for our printer cart. Still ugly. But not as much. One day I'll replace our cart with a nifty piece of furniture and actually hide the printer. I love how Brooke from Velvet and Linen hid her uglies in baskets.

The industrial stool I picked up years ago at a junk shop. Lucky me that day!

So, this is where I will sit and continue to blog. ;) Thanks for all the kind comments and encouragement to keep it going. I think I will.
(oh, and that Friday Feature idea I had? Two weeks of no Feature=bad idea)
(click on the pictures to see a larger version)

I even surprised myself with all the black. And red.

Just about everything in this room came from Ikea or Target.
The beds.
The quilts.
The pillows.
The desk.
The lamps.
The nightables.
The dresser.
The basket.
The plant.
The desk containers.
The clock.
But not the cat.

And with the exception of a few antique store finds sprinkled in.

Like this vintage desk chair. Only $35. It makes the room, in my opinion.

Not only is it handsome, but useful too. My son, Gavin, does his schoolwork here every day.

I made a slipcover for the seat using an old J. Jill linen skirt I hardly ever wore.

Some fake greenery sits on the desk. For boys who would likely forget to water.

On the walls, we spaced two strips of small trim far apart, then painted in between the same color. Giant chair molding!

The other side of the room:

Another antique chair. It's not comfortable, but it sure looks pretty.

The vintage airplane paintings I found for a few dollars .

"Silly", the cat, poses in her favorite spot on Caleb's bed.

Little does she know she coordinates perfectly.
